A few years ago, I bought a scythe and exhausted myself trying to use it. I've resisted using it ever since - until now. Just watched a few videos on youtube by "The Jolly Scythers" which helped me set my (much cheaper) tool up, then watched this awesome video, that includes how to make a haystack:
The information-gathering is complete. The next step on the road to self-sufficiency is about to begin...
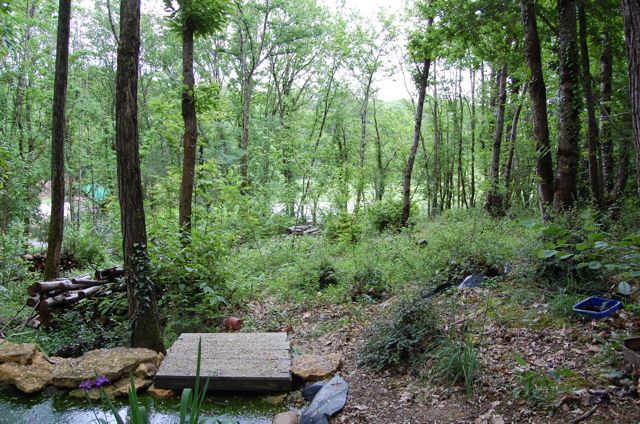
Monday, 28 May 2012
Thursday, 24 May 2012
Solar shower power
A few weeks ago, we bought a 28-metre string of solar fairy lights from Nigel's Eco Store. Twenty-eight metres! That's enough to go all the way round the snail-shell solar shower, then across to - and all the way around - the tree bog. Look:

Can't see them? How about now:

Only one thing confuses me about these lights - and that's this claim made on the box: "Up to 40 hours run time per night".

Can't see them? How about now:

Only one thing confuses me about these lights - and that's this claim made on the box: "Up to 40 hours run time per night".
Tuesday, 22 May 2012
The coppicing experiment
During the winter of 2010-11, I started a long-term experiment in coppicing. This meant cutting all the overstood sweet chestnut from a patch of woodland near us, with a view to using the new growth for heating in about seven years time. Some young chestnut will be layered and others will, no doubt be taken for fencing by Her Outdoors.
Although each tree was carefully cut at an angle to shed water, then stacked for burning during the winter of 2012-13, the effect when I'd finished was dramatic. Here's the photo from February 11th 2011:

Some of our chickens were killed by an unknown predator early last year, which gave us the chance to transplant a few healthy ash saplings to add a bit of variety, but otherwise we left the area completely alone. And this is what it looks like today:

If a millionth of a millionth of the life seen in this image was discovered on another planet in our solar system, it would be heralded as the discovery of the millennium and radically change the way our species sees itself. But this is what we have, literally in our own back yard. To be honest, having been completely responsible for the first photo, it's a bit of a relief.
More on this, much later.
Although each tree was carefully cut at an angle to shed water, then stacked for burning during the winter of 2012-13, the effect when I'd finished was dramatic. Here's the photo from February 11th 2011:

Some of our chickens were killed by an unknown predator early last year, which gave us the chance to transplant a few healthy ash saplings to add a bit of variety, but otherwise we left the area completely alone. And this is what it looks like today:
If a millionth of a millionth of the life seen in this image was discovered on another planet in our solar system, it would be heralded as the discovery of the millennium and radically change the way our species sees itself. But this is what we have, literally in our own back yard. To be honest, having been completely responsible for the first photo, it's a bit of a relief.
More on this, much later.
Monday, 21 May 2012
Tree bog finishing touches
I'm showing all the stages of the tree bog, because at least one reader is just about to start theirs and you never know who could glean what from my experience...

Having decided to use tongue and groove, I needed to add extra joists on either side of the seat to make sure the platform is solid. I also decided to make a wrap-around chute to encourage the processed food to gather in the right place, rather than just a urine guide at the front. The chute is stapled around the joists but stops above the straw to encourage airflow in the chamber (this is a key part of tree bog functioning from what I've read, but there aren't many around and I'd love to have some feedback from people who know more about it).
Although there's a good chance the chamber on the left will never fill up (we only have two yurts and are only open for a few months of the year), I've left the option to switch sides open because there's NO WAY I'm going to want to play around down there after the tree bog opens for business in the next few days.
Saturday, 19 May 2012
Inside the tree bog

This is the dry fit of the seating area. I ended up using the same tongue-and-groove as the flooring instead of ply, partly because of the horrible glue used to make ply, partly because I didn't know what finish to use so it could be cleaned easily, and partly because - at €39 per square metre - it was far too expensive. (Also, I think ply always looks a bit naff.)
On the left you'll see some trim I'm going to use to finish the bog. I've never used trim before, but the pine is from trees only a couple of hours away from here and it should look excellent.
(It'll also give me an easy headline for a blog post next week.)
Friday, 18 May 2012
The écovallée snail-shell solar shower
A solar shower was always going to be part of the écovallée experience. Originally, I wanted us to have the latest and greatest green technology for our guests to enjoy. But the costs of running electricity to the field, the twin-coil boiler, evacuated tubes etc. - in France - were prohibitive.
Of course, we've got books on DIY solar showers and considered black radiators under glass, hoses in strings of plastic bottles, buckets with holes in the bottom and all that fun stuff. But even with our "budget", we're still aiming to provide an unexpected level of luxury. Plus, many of our guests have very young children who need a controllable source of hot water.
So we ended up buying an aluminium swimming-pool shower, and knocked up a temporary cubicle for 2011...

...while we worked out how we were going to make this (as conceived by Her Outdoors):

Fortunately, Project1p happened and we swapped what we had (one week in a yurt) for what was on offer (a custom-made metal object):

I asked a local company what the wood would cost, turned down their estimate of €1,400 and bought it for €83 from a local wood yard, then spent five days sanding it. Finally all the elements were in one place:

We laid out the snail shell shape:

And started with the short side:

Which was up by the end of the day:

And looked pretty good, even if I do type so myself:

The next day saw the snail shell finished:

Which just needed oiling and photographing:

A few times:

Even if it meant lying in the shower tray to get the shape just so:

And not forgetting the penny that helped it all happen:

You might have noticed the gravel bed behind the temporary shower cubicle in the first shot. This is the first stage grey-water treatment before draining into a willow trench planted a few years ago. Here's what it looks like at the moment, after one year of plant growth and some finishing touches by Her Outdoors:

Something else that will only get more and more beautiful over time.
Wednesday, 16 May 2012
The (almost complete) tree bog

Two coats of white-staining oil for the floor and some recycled tongue-and-groove, and we're nearly there. I've got the toilet seat. You're going to love the toilet seat.
Sunday, 13 May 2012
Orchid news
Her Outdoors spotted this yesterday behind the tractor shed:

We think it's a Violet Birdsnest Orchid - and will be keeping a close eye on it in the next few days.

We think it's a Violet Birdsnest Orchid - and will be keeping a close eye on it in the next few days.
Field study

In the last few days, our hand-sown crop has grown heads. Mainly on the bits we manured.
How to re-register a car in France
If you know anything about the cost of second-hand cars in France, you won't be surprised to read that I got our new-used car in England. If you're thinking of doing the same, you might find the following useful.
The first thing to do was switch the headlights over to left-hand drive headlights. We used Headlampshop on ebay, following a recommendation, which all went smoothly (and cost about €260). Because the fitting wasn't a simple spanner and hammer job, I used our local garage (which cost about €80).
Then I needed a Certificat de Conformité from Toyota France. This is a piece of paper that says the car can be driven on French roads. I tried to get around it, but discovered it is currently compulsory. A mugging at pen-point, if you like - or even if you don't (which cost €135 but is dependent on car make, type, power etc).
Armed with this, I could put the car through its Contrôle Technique. This is the French equivalent of the UK's MOT but only needs to be done every two years. The mechanics are reassuringly thorough and the whole thing takes about 30 mins (and cost €68).
Armed with this, I could go to the Sous Préfecture in Bergerac. I also took the UK registration document, Certificat de Conformité, my passport, a justificatif de domicile (recent bill to show we live here), my insurance documents and anything else I could think that I might be asked for. The woman handed me a Carte Grise (vehicle registration) request form and wrote on the bottom that I was missing a "quitus fiscal". This I needed to get from the Hotel des Impôts. I went and watched a woman complete, by hand, a beautiful form - in triplicate - who handed me the top copy. It seemed pointless, although charmingly antiquated, and I began to feel empathy towards people in offices doing this for a living (or more likely, a retirement, but that's a different story). I went back to the Sous Préfecture and handed all my papers over again, answered a few questions, watched the woman trying to make sense of forms she saw every day (with increasing empathy), was given a new form to take to the next window with everything else and paid for our new number plate (cost €96.50 and is also dependent on the type of car).
I knew from before that I had only a short time in which to change the plates or face a fine, so I immediately went back to the garage. They ordered and fitted the plates for me (for about €50).
Now all that remains is to go back to the Contrôle Technique and have them put a sticker on my shiny new Carte Grise, and to tell my insurance company about the change, so they can print out a new - and final - piece of paper for me. I don't think this will cost anything.
Any questions?
Thursday, 10 May 2012
Tree bog. Nearly. Finished.
This morning I had a superb brush with bureaucracy (nothing too exciting - it's to do with a number plate), then picked up some decking pieces that meant I could spent the afternoon doing this:

Cutting flooring around posts with a blunt, antique coping saw could be easier, but if you don't worry about how long it takes, it's really not so bad. (I also got to use the rasp my dad gave me a few years ago. Rasps are cool.)

Cutting flooring around posts with a blunt, antique coping saw could be easier, but if you don't worry about how long it takes, it's really not so bad. (I also got to use the rasp my dad gave me a few years ago. Rasps are cool.)
Monday, 7 May 2012
How to make stairs - first steps
I did try to look up how to make stairs on the Interwebs, but nothing was forthcoming. So as usual, we had to make it up ourselves.
The steps I needed were to get from the ground to the tree bog. We agreed on the angle, I made some measurements, then couldn't get my head around how the steps would work with my incline. Her Outdoors (who is MUCH cleverer than me) came to the rescue and together we came up with this drawing:

It's a bit confusing, so I drew it again, overlaying (in grey) the 200 x 38 mm piece of wood that would support my steps:

Satisfied (and remeasuring for good measure), I drew the template onto a piece of wood - using a protractor for the first time in (garbled)ty-(unclear) years!

Then cut the shape out - twice:

Dug a couple of acacia supports into the ground and knocked it all together:

Steps in place, I could finally get on with laying the floor of the tree bog. More on this, later.
Friday, 4 May 2012
On my work bench
Just over 12 years ago, I bought a work bench from Travis Perkins. I don't think it cost much. I used it for the occasional DIY job when we lived in a house. It lived outside (it was only a little house) unprotected from the elements. It came with us to France and still lived outside. The leg braces broke a couple of years ago, but nothing that couldn't be fixed with a bit of rope. Sadly, at the end of last year, it died.
I looked at the work benches in my local DIY place and was STUNNED by the prices. Not just that, but none of the benches on offer had wooden worktops (my cheap old one did - which is how it survived for so long). Fortunately, my dad had an almost new leading-brand work bench in his garage which he let me scrounge. I tried to look after it, but eventually it found its way outside for a few days. I also did some round-wood work with it, which is quite normal for us, but which immediately demolished the pressboard worktop. Look:

Absolute crap. Almost certainly designed to fall apart*. For the price it probably was, scandalous.
Fortunately, I had some pieces of chestnut lying around from a failed kitchen cupboard project and knocked up a new worktop in a couple of hours.

I had to do this because I was just about to go to work on the project1p solar shower. And I hope you'll agree, if you're going to work on a solar shower that's been in the making for a Very Long Time and has cost an Eye-wateringly Large Amount of Money, you're going to need a decent work bench.
More on this, later.
*(For more on designed obsolescence, I strongly recommend you watch Pyramids of Waste aka The Lightbulb Conspiracy (2010). Contains some very surprising information and tells you why that leading-brand printer isn't working any more.)
I looked at the work benches in my local DIY place and was STUNNED by the prices. Not just that, but none of the benches on offer had wooden worktops (my cheap old one did - which is how it survived for so long). Fortunately, my dad had an almost new leading-brand work bench in his garage which he let me scrounge. I tried to look after it, but eventually it found its way outside for a few days. I also did some round-wood work with it, which is quite normal for us, but which immediately demolished the pressboard worktop. Look:

Absolute crap. Almost certainly designed to fall apart*. For the price it probably was, scandalous.
Fortunately, I had some pieces of chestnut lying around from a failed kitchen cupboard project and knocked up a new worktop in a couple of hours.

I had to do this because I was just about to go to work on the project1p solar shower. And I hope you'll agree, if you're going to work on a solar shower that's been in the making for a Very Long Time and has cost an Eye-wateringly Large Amount of Money, you're going to need a decent work bench.
*(For more on designed obsolescence, I strongly recommend you watch Pyramids of Waste aka The Lightbulb Conspiracy (2010). Contains some very surprising information and tells you why that leading-brand printer isn't working any more.)
Thursday, 3 May 2012
Field study
OK, this is not the most interesting thing going on at the moment, but I've started, so I'll finish. This is what our field crop is looking like today - after a month of rain and a few days' sunshine. You can still easily see where we put the semi-rotted horse manure just before we sowed.

Trust me, in the long run this will be interesting in some way.
(Orchid watchers will be pleased to know that Pyramid Orchid leaves have been spotted on the land today. Solar shower watchers will be in for a real treat in the coming days.)

Trust me, in the long run this will be interesting in some way.
(Orchid watchers will be pleased to know that Pyramid Orchid leaves have been spotted on the land today. Solar shower watchers will be in for a real treat in the coming days.)
Subscribe to:
Posts (Atom)